What’s better than a warm soak in the tub at the end the day? A warm soak in the tub with a lovely fizzy, scented bath bomb, of course! If your kids are anything like mine, they would be happiest if they could use a bath bomb every single night. They just love them. Thankfully, they can be made at home with everyday ingredients and they’re actually so easy to make that older kids can do this themselves! We make ours with kid-friendly essential oils and natural food colouring, but you can customize yours however you like: keep them uncoloured and unscented, add dried lavender buds, or hide a little surprise toy or figurine inside!
Homemade Bath Bombs Kids Can Make
- 1 cup baking soda
- ½ cup corn starch
- ½ cup Epsom salt
- 2 tbsp favourite oil
- 1 tbsp water
- 5–10 drops kid-safe essential oil (our top picks are lavender, sweet orange, and tea tree)
- ½ cup citric acid
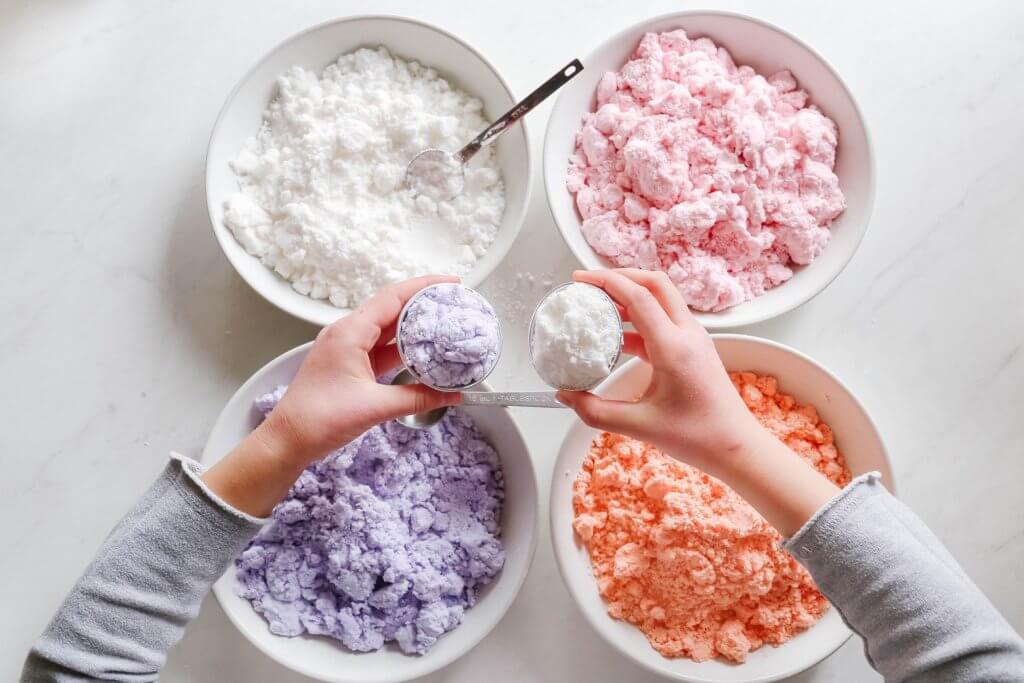
- natural food colouring (optional)
- bath bomb mould or silicone mould
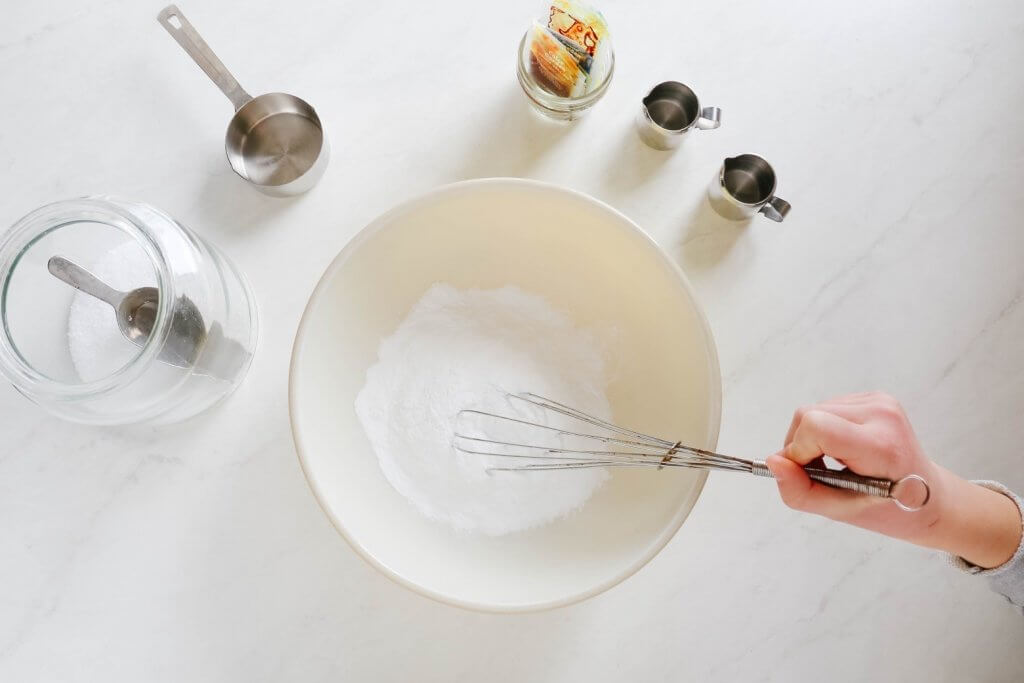
- Start by whisking the baking soda, corn starch, and Epsom salt together in a large mixing bowl. You want the mixture to be a smooth and clump-free as possible.
- Next, add the oil, water, and essential oil. If you’re using natural food colouring to make your bath bombs colourful, adding it to the water first can be helpful for dispersing the colour evenly. Whisk the wet ingredients into the dry ingredients until fully combined.
- Onto the most important part—the citric acid! This is what will give your finished bath bombs their signature fizz. The key with the citric acid is to add it slowly and stir it in very gently… We want to save as much of that fizzy reaction as possible for the bath! If it fizzes while stirring it into your mixture, add it in smaller bits at a time and stir more slowly. Once combined, your mixture should resemble wet sand and come together in a clump when squeezed in your hand. If it seems too dry, add tiny bits of water and mix until it does hold together.
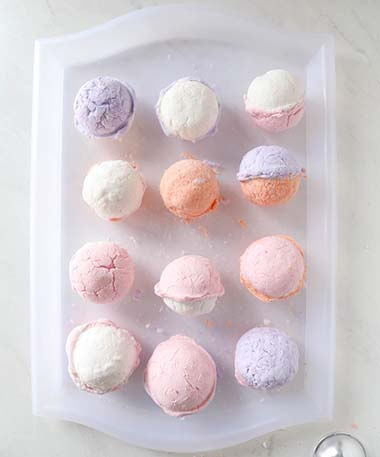
- Time to make our bath bombs! If you’re using a bath bomb mould, overfill both sides of the sphere and press them together firmly. Remove the excess mixture around the centre with your fingertip, and very gently remove one side of the mould. Place the bath bomb on a tray with the mould side down and allow it to dry out a little bit before trying to move the other side.
- Once you’re ready to remove the other side, carefully flip the bath bomb so the uncovered side is facing downward in your hand, and very gently remove the remaining side of the mould.
- Pro tip: If you’re having a hard time removing your bath bombs from the moulds without having them crack, lining the mould with a little bit of clean plastic from the recycling bin can be really helpful. Either way, if a bath bomb does crack, the beauty of this project is that you can just press it back into the mould and try again.
- 6 Once your bath bombs are completely out of the moulds, allow them to dry at least overnight, but preferably for a full 24 hours. When they’re completely dry, they can be stored in an air-tight jar until used.
Don’t have a bath bomb mould?
Use a silicone mould or silicone ice cube tray instead! Just as with the other method, you’ll want to overfill your mould and press your mixture down firmly into it. The main difference here is that if you’re using a silicone mould or ice cube tray, you’ll need to allow your bath bombs to dry out completely before attempting to remove them—approximately 36 to 48 hours. This approach does take a little more time, but is definitely easier and more little-kid friendly.
Jen Kossowan is a kindergarten and grade one teacher and mama of two gorgeous kiddos. She’s passionate about play, loves a good DIY project, and can most often be found in her kitchen whipping up recipes that taste delicious while meeting her crunchy mama criteria. She started Mama.Papa.Bubba. on a whim in 2010 while living in the Middle East and has been sharing her recipes and activities there ever since.
mamapapabubba.com | @mamapapabubba
Article was published in The Good Life magazine.