Wait! Before sending your food scraps off to the compost, use them to make gorgeous, natural paints! Really. This project is part upcycle, part experiment and part art, and it’s oh so much fun.
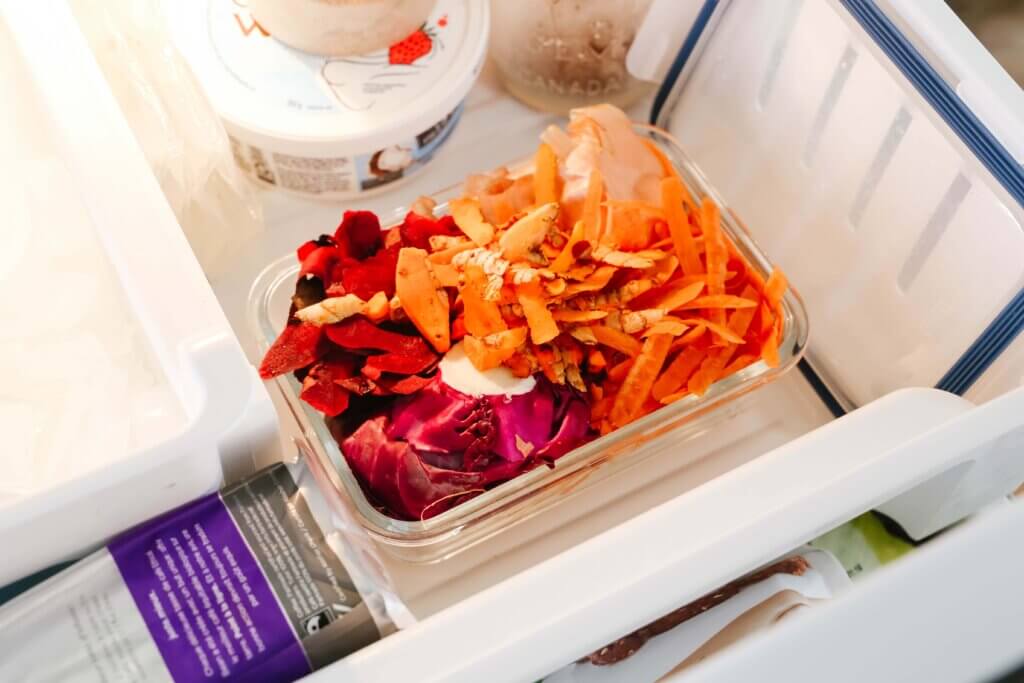
Save it all—onion skins, carrot peels, wilted spinach leaves, orange rinds, beet peels, floppy purple cabbage leaves, avocado pits and skins, used coffee grounds, blackberries and blueberries past their best, turmeric peels and whatever else you think might work. (There’s no harm in trying, right?)
One word of caution before you get started: making and using these paints may lead to staining, so that’s definitely something to be mindful of—especially when involving little ones.
Get Scrappy
Keep a wide, shallow container in your freezer and add your scraps to it as you go. When you decide it’s a good time to make paint, all you have to do is separate your scraps into similar colour piles. Keep a lid on the container when not in use.
Make It
Making the paints is so, so easy and quantities don’t need to be exact.
What You’ll need:
food scraps • small pots • water
mesh strainer • jars for your paints
Step 1
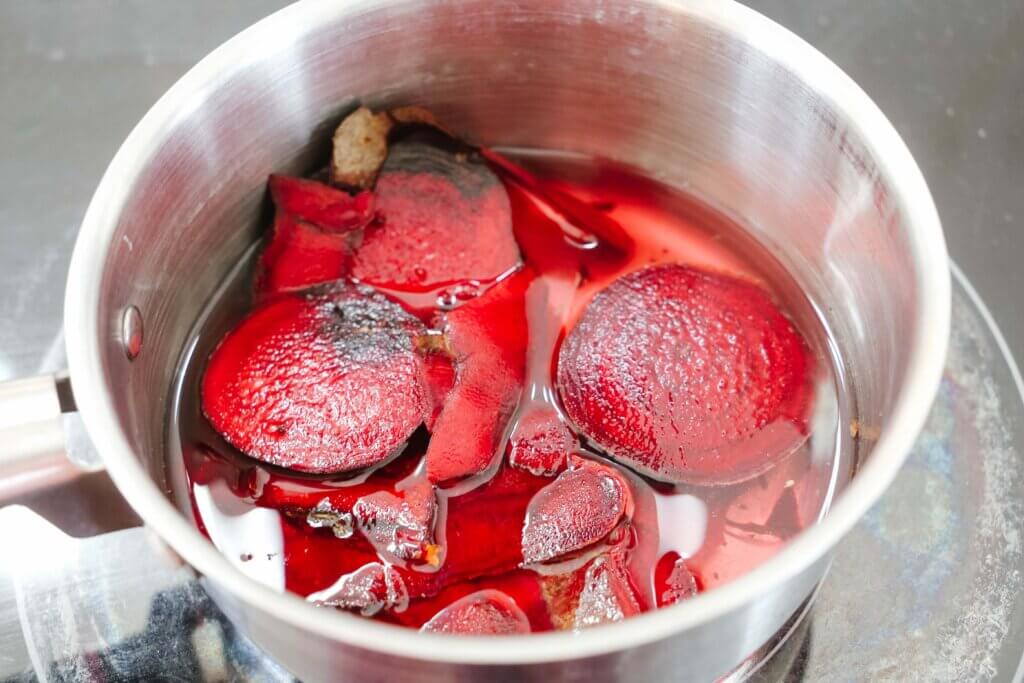
Place some food scraps into a small pot. This can be a single type of food scrap, food scraps in the same colour family or a combination of differently-coloured food scraps (for example, all carrot peels, carrot and orange peels or a combination of carrot and beet peels). Whatever floats your boat!
Step 2
Add just enough water to mostly cover the scraps.
Step 3
Bring the food scraps and water to a boil, turn the heat down a little bit and let the mixture simmer. A longer simmer time usually means a more vibrant paint, but in the case of something like purple cabbage leaves, you might notice that more time may change the colour of the water altogether (from blue to purple). Depending on what kind of food scraps you’re using, mashing them with a fork while they simmer might be helpful!
Tip: As the food scrap paints simmer, carefully dip small test strips of watercolour paper into the mixture to test the colour. If the paint is too pastel for your liking, keep simmering!
Step 4
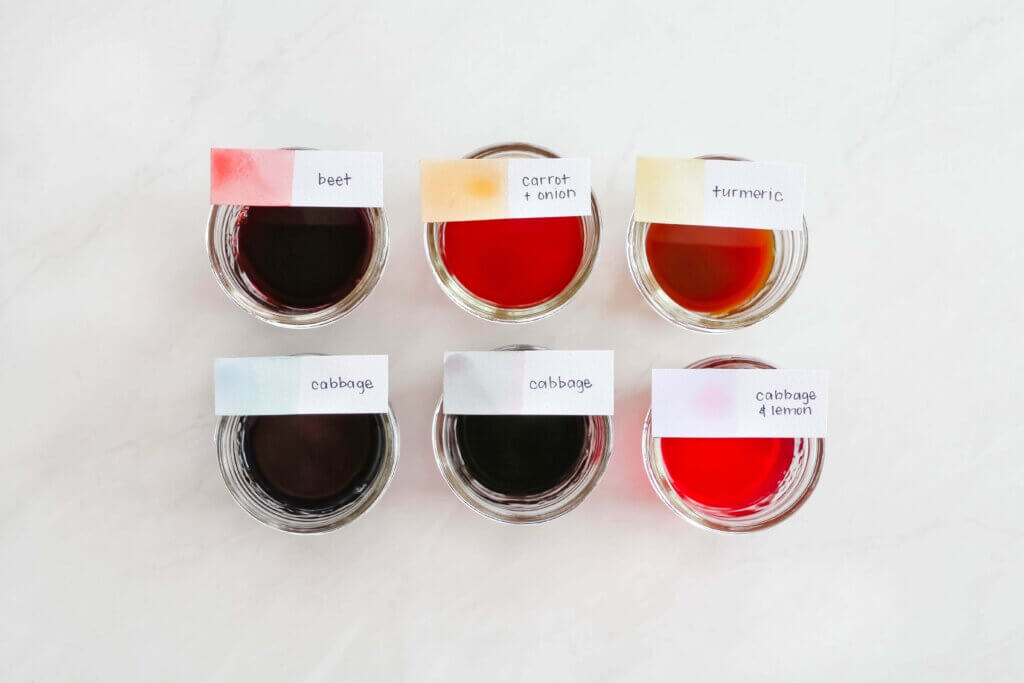
When your paints have reached your desired vibrancy, carefully pour them into jars using a mesh strainer to remove the food scraps. In the case of items like coffee grounds, you can add a coffee filter to your strainer or use a nut milking bag instead.
Step 5
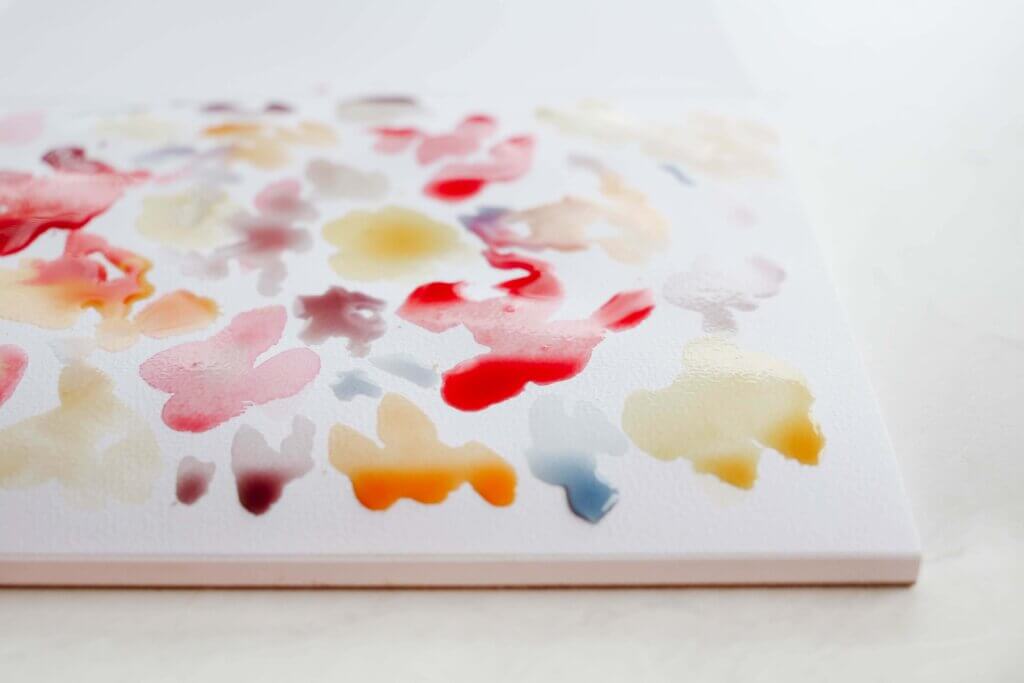
Allow the paints to cool and then they’re ready to use! Pair them with brushes of various sizes and some watercolour paper and you’re ready to paint.
When you’re done painting, pop a lid on your jars and store them in the fridge for at least a week (but most often much longer).
Have fun!
Jen Kossowan is a kindergarten and grade one teacher and mama of two gorgeous kiddos. She’s passionate about play, loves a good DIY project, and can most often be found in her kitchen whipping up recipes that taste delicious while meeting her crunchy mama criteria. She started Mama.Papa.Bubba. on a whim in 2010 while living in the Middle East and has been sharing her recipes and activities there ever since.
mamapapabubba.com | IG: @mamapapabubba